Archive
The Mystery of Marvel Oil
Just a quick update: I added Marvel Mystery Oil into the mix. My last post I added my 50/50 mix of acetone and ATF in the engine and have let it sit ever since. Every few days I apply some heat via my MAP gas torch, tap the cylinder and piston crown with a piece of wood and a hammer to try to loosen some things up, but nothing budges. I’ll keep it soaking and see where it goes. The Marvel Mystery Oil certainly won’t hurt.
Under the skirt.
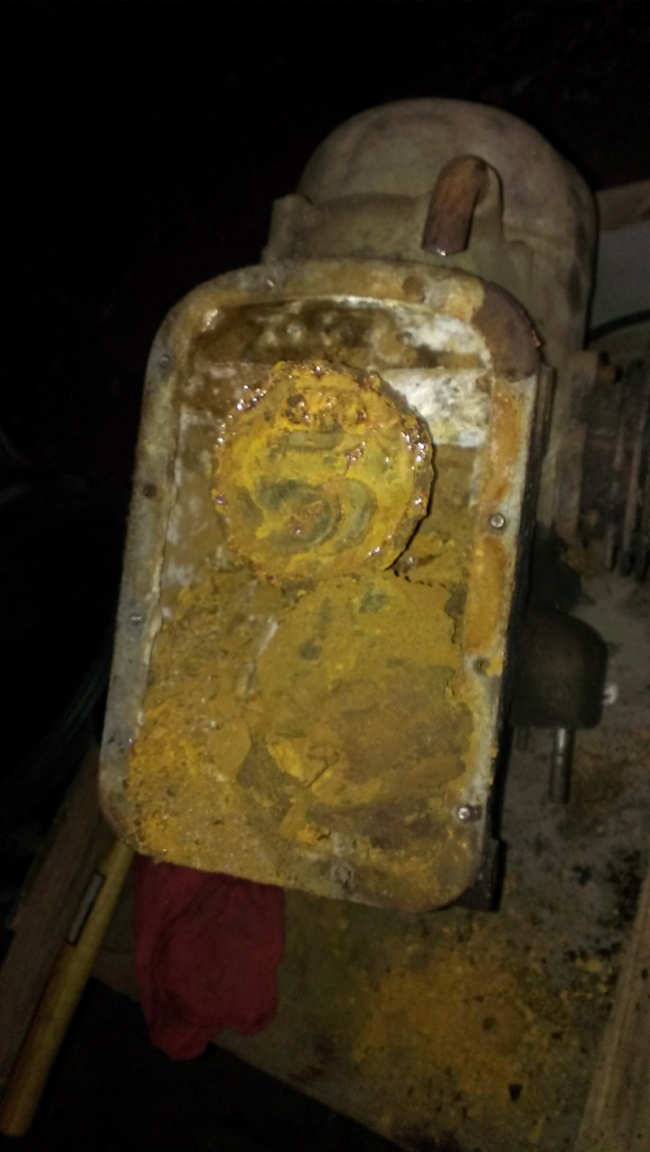
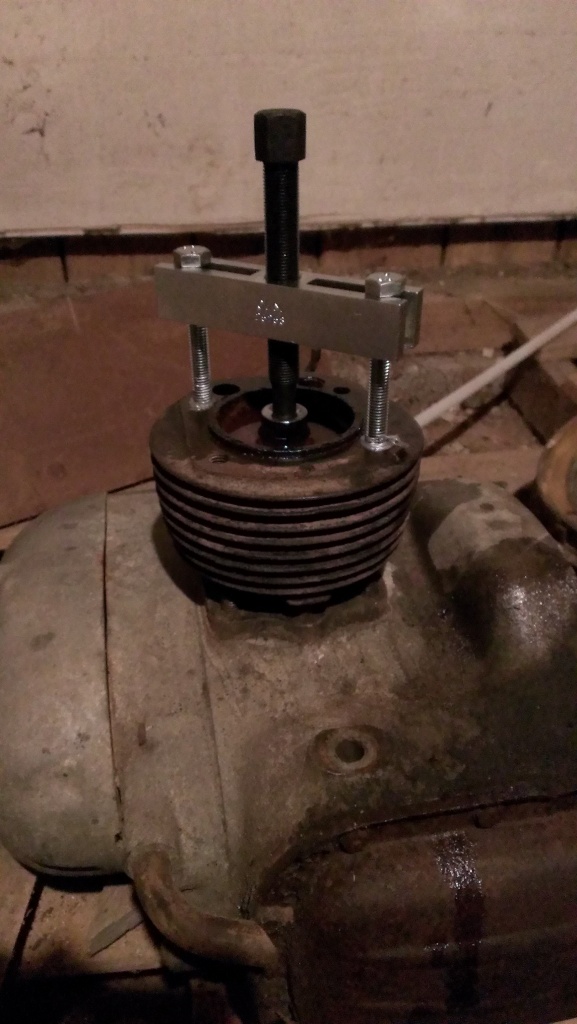
After several heating/pressing cycles with the timing gear puller and fun with MAP gas, I poured a bunch of phosphoric acid (naval jelly) in the cylinder. I think it did a pretty good job of eating away the visible rust. I heated the cylinder a few more times with MAP gas, and still nothing. So tonight I removed the sump pan. Unfortunately, one bolt was already snapped off and several more lost their heads before I was finished. But, the sump is now off. Here is the mess I encountered.
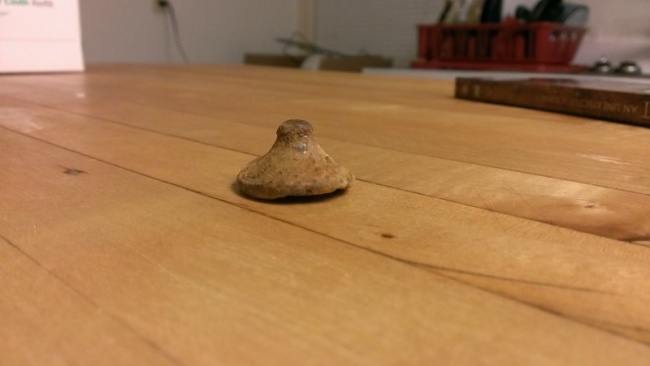
I vacuumed it out and found some missing parts, including the likely reason the right cylinder was pulled off long ago and is now missing:
That valve is cupped like a taco and the stem broke years, or maybe decades ago. Once the sump was cleared out and looked at the underside of the cylinder I’ve tried to remove. I found a bunch of rust clinging to the bottom of the piston skirt.
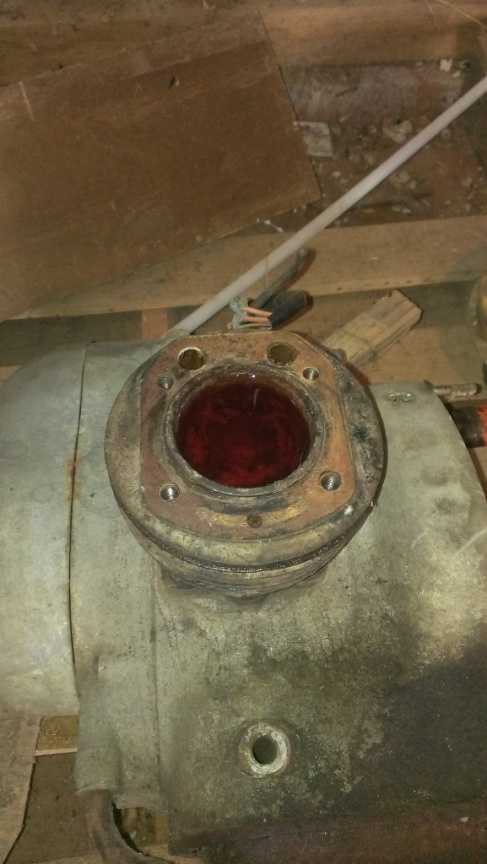
I filled the cylinder and part of the crankcase with another 50/50 mix of acetone and ATF, pouring the mix all over the big ends as well. I’ll let it sit for a few weeks and then try again.
Applying a little heat
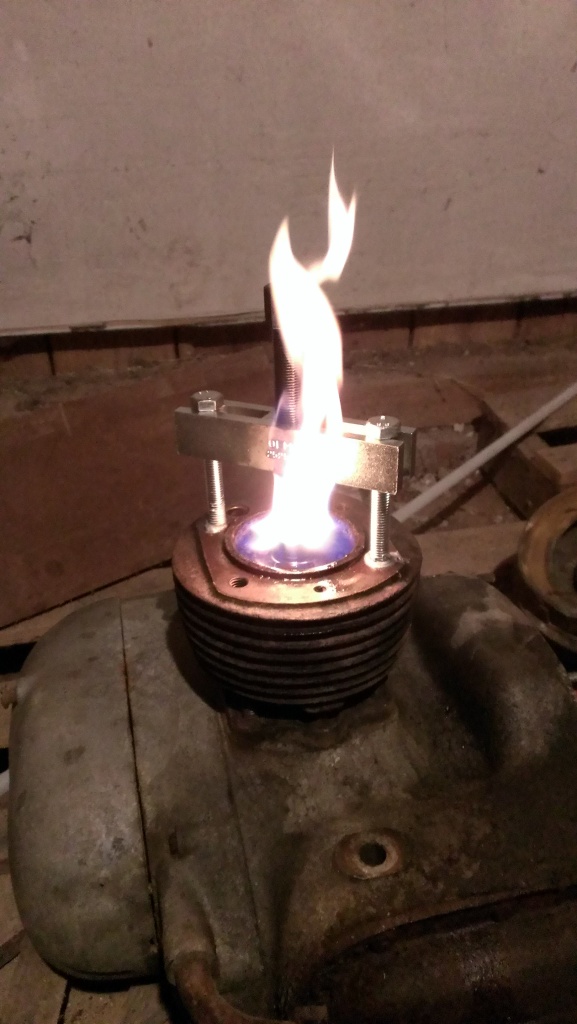
Yesterday evening I made another attempt at tightening my new rig. It was just as tight as the night before. So I decided to apply a little heat. Fortunately the cylinder was filled with my 50/50 mix of acetone and ATF. Acetone catches fire really easily.
After several heating cycles, I tapped my puller with a hammer hoping it would break something loose. The puller would tighten ever so slightly with the taps, which got me excited. I looked at the joint between the cylinder and the engine and it wasn’t opening up. Fearing I would strip the threads in the cylinder, I backed off, added more acetone and set the thing on fire again. This time I only applied hand pressure to the puller. Again, it wouldn’t budge.
Years ago when I was working at a lab I had access to phosphoric acid. This stuff eats away at rust, and does a very good job at it. In fact, I’ve cleaned some motorcycle oil and gas tanks with it with great success. Phosphoric acid is also a major ingredient in naval jelly. So, after another trip to Home Depot, I smeared some of the stuff around the cylinder and piston. I’ll let it sit and do its job for a little while and take another crack and the cylinder again this afternoon.
Applying a little pressure
It’s been almost a week since I first poured my 50/50 mix of acetone and ATF into the left cylinder. The thing hasn’t shown any signs of even wanting to move as I’ve tugged on it. So I decided to apply a little pressure. The cylinder head bolts are M10x1.50 bolts. After a trip to Home Depot to buy some of those, I went to AutoZone and purchased a timing gear puller. All in all, it cost me a little over $20.
I applied a liberal dose of antiseize to the two bolts and threaded them all the way down in the cylinder to give them the most purchase on the threads. I put a socket in the center of the piston over the small end and screwed down the timing gear puller onto a socket until it was really tight. I know it’s relatively easy to strip the threads on a /5 cylinder, so I was careful not to overtighten the puller on this one. I’ll let it sit and try to tighten it a bit more tomorrow.
Let’s try some ATF and acetone
Wow, it’s really been 2 years, 2 months and 4 days since I last posted here. I’m living up to my long rebuild statement. A lot has happened since then. I got a new job and moved to Maryland, living in a one room apartment while my wife remained in North Carolina, desperately looking for a job up here. I acquired a 1973 BMW R75/5 that I’ve put about 7,000 miles on since January. However, this BMW is always in the back of my mind. After 14 months of being apart, my wife and all my stuff just moved up here last weekend, so she’s now with me as well. I can finally resume work!
First thing with the engine now is to get the cylinder unstuck. So, while I’ve got time on my hands, I poured a 50/50 mix of ATF and acetone in the cylinder five days ago and covered it so the acetone would take longer to evaporate. I don’t know how long I will leave it in the cylinder, but I tried without much motivation to move it two days ago and got nothing. I think I might make some sort of press to apply a little pressure as well.
I also removed the oil dipstick and think I might need a new one as corrosion has claimed the lower end.
Before really getting into the engine, I need to get the frame repaired. I’m thinking I need to find a donor frame, or at least donor parts from other frames.
Frame modifications-part 1
It’s been 8 days since my last post. Actually, I have excuses. Three major and several minor one’s to be exact.
1. I have an article due next week, so I’m in the process of writing. It’s taken a bit of my time.
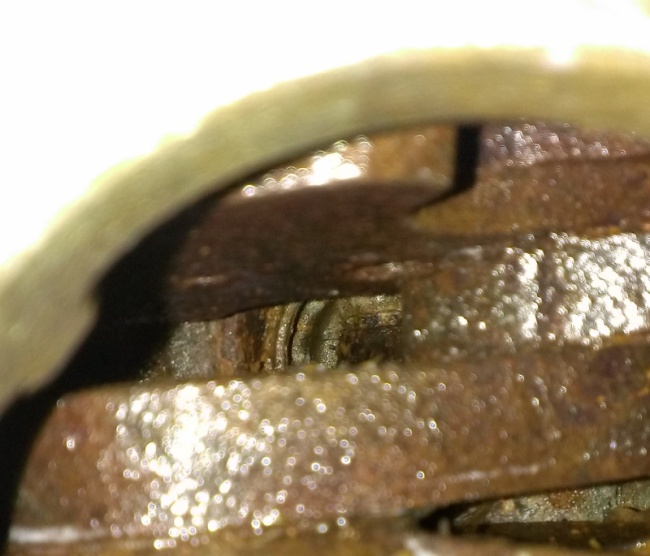
2. My BSA has started leaking oil into the left cylinder when it sits, so time was spent pulling the cylinder head. Here is a picture to pique your curiosity.
I think it’s leaking through a valve guide, but that will be sorted this weekend.
3. Money. I’m getting to the point where things will start costing, and the money tree hasn’t sprouted yet, so I’m slowing down a bit until it grows.
However, there are free things that still need to be done. Warning: the following images aren’t for the faint of heart.
Time is being spent grinding extraneous things off the frame. I started small, with a Dremel tool on the fabricated choppered seat.
It was slow going, and I couldn’t get the proper angle due to the main frame on the seat. So out with the big boy. The highway pegs were the first to go.
Unfortunately, it’s getting darker earlier, so less time is spent outside the shed. There is a long way to go with the frame, but it’ll get there. More importantly, I’m having fun doing it. Anyone have any suggestions on places to take a frame to ensure it’s straight and might have the various parts I need to fit back on the frame?
Frame (re)modifications
This weekend was rather pleasant with a visit from my dad. We didn’t do a whole lot, but it was nice to get a chance to visit with him and I got to show him this bike. Living 1,300 miles away from the rest of my family, it’s always nice to get a chance to see any one of them.
Monday was spent behind a computer again, so I cherished the chance to get out, even just to take a few pictures to start getting the frame sorted.
Photo #1–First, I need to remove the gas tank bracket (A) and move it down to the next tube (B). There is a lip on the back side of the bracket. Does this stay? If anyone needs clarification, I can take another photo. Fortunately, the PO left the old weld bead on the lower tube, so I know where it goes.
Photo #2–Next are the welded highway pegs. I’m pretty sure they need to be removed. There are also some welded eyes just beside the highway pegs to accept the shift and brake pedals (the arrows). Do these come off? Did these two down tubes have anything on them?
Photo #3–Next is the steering tube. There are two weld beads where I think the PO welding something on the front. This object is no longer there. My plan is to grind these down if nothing goes there.
Photo #4–Just on the back side of the steering tube are two drilled holes side by side. Are these supposed to be there, and if so, what are they for? There is a matching hole on the other side.
Photo #5–There is a welded plate on the frame where the arrow is located. Was this a sidecar attachment?
Photo #6–I also need to add the seat post here. I have some measurements (courtesy of Thaemlitz), and will elaborate on this in the future once I get my thoughts and notes together.
Photo #7–The next bit is another seat attachment point. I plan to grind this off where the red line is located. Anyone have any comments about this?
Photo #8–Finally, moving to the back of the frame, I need to weld a sidecar bracket back on. I also need to weld something for a tire pump. Does anyone have any dimensions for either of these? I saw a sidecar bracket on ebay here. Is this correct? If not, does anyone have any suggestions on where to get a bracket? I also need to weld the pillion footrest on the right side.
And…done
At least with stripping things off the frame. I was able to remove the forks by pounding on the nuts to loosen the stanchions. With Shanna holding the frame, I rotated the stanchions until they popped out.
I couldn’t find a socket at Lowes to fit the nut, so on with the vice grips.
All the bearings fell out, and I think I got most of them off the floor. The triple tree is now removed from the frame. Then I removed something that looks like an electrical connection.
Everything that I want to keep is now removed from the frame. I need to figure out how to remove the top bracket for the engine mount, do some relatively minor repairs, and paint the frame.
The front fender and wheel
The power was back on in the office today, so that means I’m back behind the computer. I certainly enjoyed the previous two days and being able to work outside. That feeling was magnified by the fact that we had some cooler weather yesterday. It was absolutely gorgeous. But, because I’m behind the computer, I have the need to get back into the shed, which means more posts.
Yesterday I was having problems with my BSA. At first, it was only firing on one cylinder and then, as I got onto the road, the second cylinder kicked in. After asking questions, I figured out that rain from Monday had made its way into the float bowl. However, once the water cleared, the bike ran almost normally. Today, it really bogged down (as in running rich) coming back home and was misfiring. I also noticed when I tickled the carburetor that the right float bowl filled faster than usual. Been there, done that. I pulled the right float bowl and jiggled the float. Sure enough, the float was partially filled with gas. That’s two float bowls in two months. Half an hour later, I had a brand new float installed and leveled and the left float bowl pulled and drained, just to make sure there was no more water. Everything’s back together and ready for my commute tomorrow.
Then I turned my attention back to my project bike. The goal tonight was to get the front wheel off. I started off small, removing the left fork nut from the dampening rod in preparation for removing the forks later on. Then I removed the front fender. What a change! That thing was hideous.
Then it was the front axle. I removed the locking bolt on the left side, removed the nut from the axle on the right side, and used a punch to pound the axle out. Overall, it came off fairly easily and nothing was damaged. A stud that keeps the brake plate from rotating by sitting in a groove was a bit tough to slip off, but lifting the bike off the ground and letting it fall several times (in addition to the obligatory PB Blaster) soon loosened it up. The only thing left to remove from the frame before I can repair and repaint it are the fork stanchions and triple tree. Getting close!
Front forks and new parts
Today I went to Lowes and picked up a 30 mm socket to attempt to get the two top nuts off the forks. After the trip to pick up my new tool, it was out to the office, where I picked up the BSA. I left it there last night since it was raining…hard. As in 2″ in an hour. There was lots of flooding and I didn’t feel like riding through a foot of water.
So, with the bike back here I was able to clean up the shed from Irene and get to work on those nuts. It took lots of PB Blaster, a lot of heat, and a breaker bar. Finally I was able to break them loose.
I was able to get the right dampening rod out, and I was surprised at its condition. There is a sleeve that fits over the rod that will need to be replaced, but the rod itself appears to be in good condition.
That was about all I had time for tonight. However, I did receive a package today with a couple of parts. They are two studs (one of which will hold the front cover over the electrical components) and a regulator. These parts were graciously donated by an anonymous benefactor. I would like to extend my gratitude to that generous person.
